Here is how the pencil looks. It will take me some time to get the pressure right so I can control the line thickness.
Sunday, December 15, 2013
Playing Around With Paper 53 and My New Pen
Here is how the pencil looks. It will take me some time to get the pressure right so I can control the line thickness.
Posted by
Cora
at
8:17 PM
1 comments
![]()
Tuesday, October 29, 2013
Fairy
This is a drawing I did this weekend. I am taking an online class called Joynal with Jane Davenport. I am still learning how to use colored pencils. I do like her thoughtful look.
Posted by
Cora
at
5:42 AM
2
comments
![]()
Sunday, October 27, 2013
Handmade Book
This is a handmade book I made this weekend. I used Arches 300lb watercolor paper for the cover. The inside papers are made with Stonehenge white paper. I love the consistency of the Stonehenge paper. It is a wonderful paper for mixed media projects. You can use it with pen, ink, watercolors, acrylics and many other media types.
I used Distress Paints and inks to stencil the cover. The stencil is by Michelle Ward.
Posted by
Cora
at
10:31 AM
2
comments
![]()
Sunday, October 13, 2013
Happy Birthday Tag
I colored the metal dog tag with Distress paints and dried them with my Heat It tool to create the bubbles.
I colored the rose with Neocolor II's and finished it off with a little Fruit punch Stickles.

Posted by
Cora
at
5:53 PM
1 comments
![]()
Saturday, October 12, 2013
Embossed Metal Tape Christmas card
I am taking the Chemistry 102 class from Tim Holtz this week. This is a quick card I was inspired to make using metal tape from Home Depot. I attached it to card stock before embossing. This is a new embossing folder I just purchased by Couture Creations called Sugarplum Ball. The paints are Distress Paint by Tim Holtz. They work extremely well on metal. The stamp is by Penny Black. I punched the leaves from a Martha Stewart punch and dripped Stickles on the leaves.
Posted by
Cora
at
1:14 PM
6
comments
![]()
Tuesday, September 3, 2013
Locker Magnet
Posted by
Cora
at
9:18 PM
1 comments
![]()
Saturday, August 31, 2013
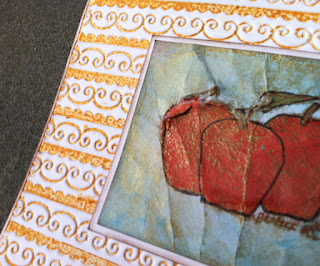
Three Apples Card
Posted by
Cora
at
6:21 PM
1 comments
![]()
Thursday, August 29, 2013
A Birthday Card for David

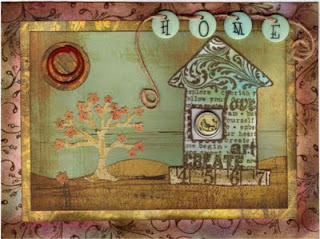
I used the riveted metal embossing folder from Tim Holtz on metal sticky tape from Home Depot. Then I painted on Vintaj Patina paint by Ranger in Onyx and Clay. I gently buffed off the ink from the entire surface and then sanded the raised areas. I stained the images with Antique Photo Distress Ink and Picket Fence Distress Stain.
Posted by
Cora
at
8:04 PM
2
comments
![]()
Friday, August 23, 2013
Friday, August 16, 2013
Friday, August 9, 2013
A Stroll in the Park


Posted by
Cora
at
5:54 PM
2
comments
![]()
Labels: Digital Tuesday, Punches, Two For Tuesday
Friday, August 2, 2013
Friday, July 26, 2013
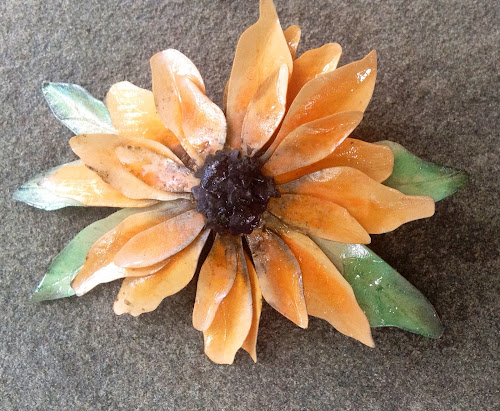
A Black Eye Susan Barrette using Sizzix Susan's Garden Die
As a girl born and raised in Maryland, my favorite wildflower is the Black Eyed Susan. All along the highways in my home state you can see them growing. I made sure to plant them at my home in CT now that I am adult to give me that piece of Maryland. So when I saw this Susan's Garden Bigz die by Sizzix I knew I had to have it. I made with the die a Black Eyed Susan barrette for my daughter the other night. I colored the petals and created the the black powder look on the petals with Pan Pastels. I then finished it with a coat of Triple Thick by Deco Art. I glued the flower to the barrette with the same glue I used to put the flower together, The Ultimate. It is extremely strong and great to add firmness to paper projects.
Modeled by my daughter.
Posted by
Cora
at
4:04 PM
2
comments
![]()
Sunday, July 21, 2013
A Beautiful Rose Made With Susan's Garden Dies by Sizzix
Today I experimented more with the Sizzix Susan's Garden dies. This time I made a beautiful rose. I will have to save this and add it to an arrangement or wreath.
Posted by
Cora
at
8:25 PM
1 comments
![]()
Labels: Paper Flower Projects, sizzix
It's a Boy Card
A friend is having a baby boy in a week and I made her this cute card.
I used a Sizzix Embossing Folder inked with Archival Ink by Ranger to create the background. The stamps are by Printworks and All Night Media. I stamped the images with Sepia Archival Ink and colored them with Copic markers.
Posted by
Cora
at
8:20 PM
1 comments
![]()
Saturday, July 20, 2013
Experimenting With Susan's Garden Dies
Posted by
Cora
at
8:34 AM
1 comments
![]()
Labels: dies, Paper Flower Projects, sizzix
Wednesday, July 3, 2013
Cool Book Box
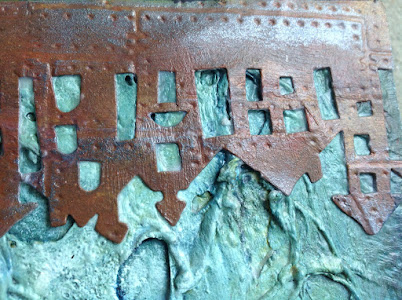
I used Decoart Americana and traditions paints. The box was from Hobby Lobby. The die cut houses are Tim Holtz and I used a Tim Holtz embossing folder for the line and dot pattern. The texture technique on the box is from the class as well as achieving the rusty look on the die cut.
I used Tim Holtz tissue tape on the sides and stained it with Distress Stain.
Here are a few close ups of the rust technique.
Posted by
Cora
at
6:55 AM
1 comments
![]()
